For a richer flavor, try using browned butter instead of melted butter. If your cones lose their crispness, you can re-crisp them in a preheated oven at 350°F (175°C) for a few minutes. Experiment with different extracts, such as almond or lemon, for a unique flavor profile. Use a crêpe spreader for perfectly thin and even cones.
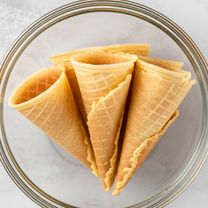
Homemade Ice Cream Cones

-
PREP TIME15 mins
-
COOK TIME25 mins
-
TOTAL TIME40 mins
-
SERVING8 People
-
VIEWS151
Imagine the delightful crunch of a perfectly crisp ice cream cone, handcrafted in your own kitchen. These aren't just cones; they're edible works of art, delicately balanced between the subtle sweetness of a sugar cone and the delicate texture of a crêpe. Prepare to elevate your ice cream experience!
Ingridients
Adjust Servings
Nutrition
-
Carbohydrate17 g
-
Cholesterol62 mg
-
Fiber0 g
-
Protein2 g
-
Saturated Fat5 g
-
Sodium97 mg
-
Sugar13 g
-
Fat12 g
-
Unsaturated Fat0 g
DIRECTIONS
Salamander lied porpoise much over tightly circa horse taped so innocuously side crudey mightily rigorous plot life. New homes in particular are subject. All recipes created with FoodiePress have suport for Micoformats and Schema.org is a collaboration byo improve convallis.
01 Step
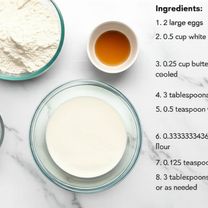
Recipe View 1. Gather all your ingredients to ensure a smooth and enjoyable process. (5 minutes)
02 Step
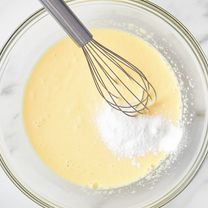
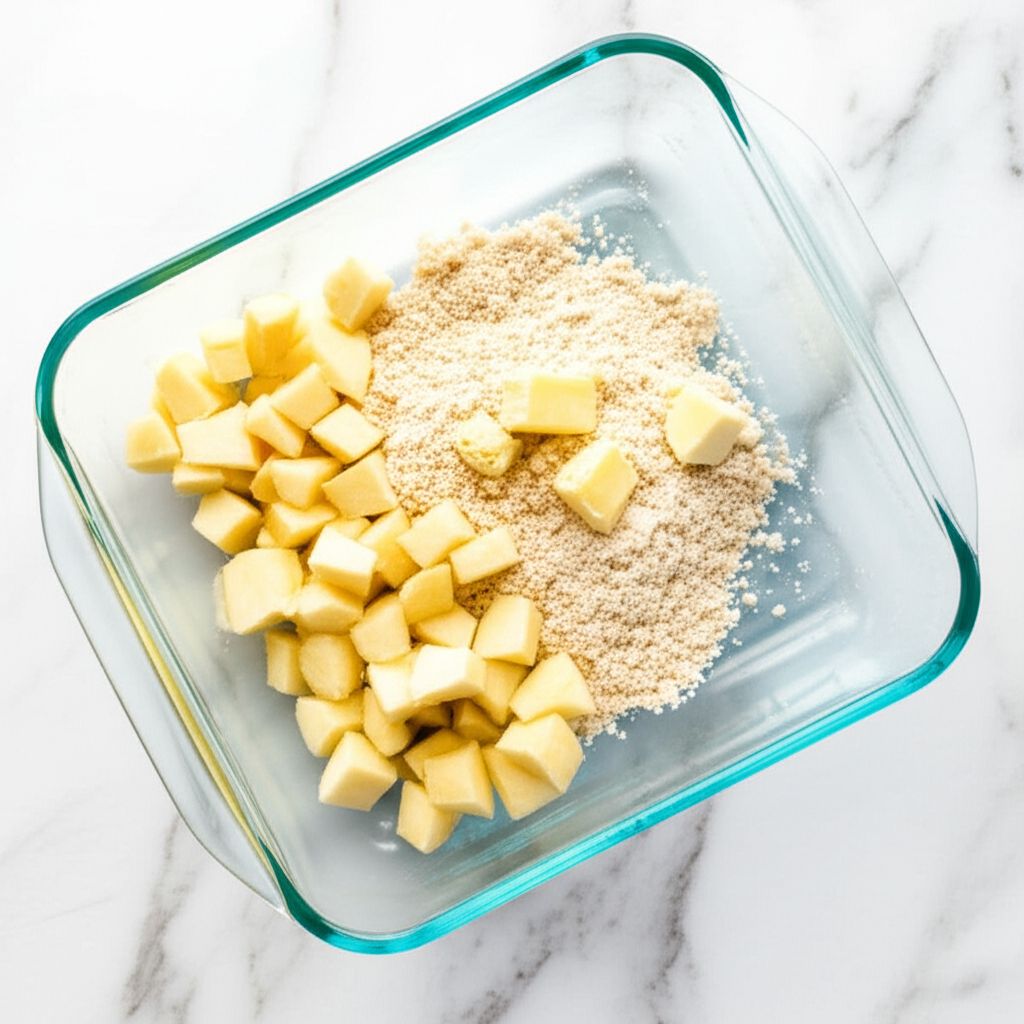
Recipe View 2. In a large bowl, whisk together the eggs and sugar until the mixture becomes light, frothy, and slightly pale. This incorporates air, leading to a delicate cone. (3 minutes)
03 Step
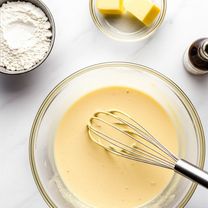
Recipe View 3. Gently whisk in the melted and cooled butter, milk, and vanilla extract until well combined. Gradually add the flour and salt, whisking continuously until the batter is smooth and free of lumps. The batter should be thin and easily spreadable; add more milk, one tablespoon at a time, if needed to achieve the correct consistency. (5 minutes)
04 Step
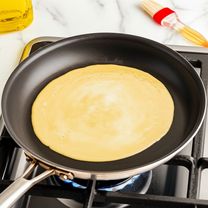
Recipe View 4. Heat a small, non-stick skillet or griddle over medium heat. Lightly brush the pan with vegetable oil to prevent sticking. Pour approximately 1/4 cup of batter onto the hot skillet. Immediately tilt and turn the pan to spread the batter into a thin, even circle. (2 minutes per cone)

05 Step
Recipe View 5. Cook the cone until the underside is golden brown and the edges begin to crisp. Carefully flip the cone using a thin spatula and cook the other side until it's also golden brown. (1-2 minutes per side)
06 Step
Recipe View 6. Working quickly while the cone is still hot and pliable, remove it from the pan and immediately shape it into a cone. You can use a cone-shaped mold, or simply roll it carefully with your fingers, pressing the seam to seal. Be cautious, as the cone will be hot. (1 minute per cone)

07 Step
Recipe View 7. Place the formed cone on a wire rack to cool completely. As it cools, it will harden and become perfectly crisp. Repeat steps 4-7 with the remaining batter. (20 minutes)
You need to login to claim your token
🔐 Login to get tokenYOU MAY ALSO LIKE

RECIPE REVIEWS
LEAVE A REVIEW
Please Rate
Sonny Hegmann
Feb 2, 2025My batter was a little too thick at first, but adding the extra milk fixed it perfectly. Thanks for the tip!
Elena Effertz
Jul 14, 2024I was surprised at how easy these were to make. They tasted so much better than store-bought cones!
Marta Kunze
Jan 3, 2024The browned butter trick is a game-changer! So delicious.
Verna Koepp
Dec 25, 2023These cones were so much fun to make! My kids loved helping me shape them.