Use caution when working with pickling lime (calcium hydroxide). It is a caustic substance and can cause skin irritation. Wear gloves and eye protection, and avoid inhaling the dust. Keep out of reach of children. The pickling time may vary depending on the size and variety of zucchini. Check for translucency and desired crispness during the second simmer. If you prefer a spicier pickle, add 1/2 teaspoon of red pepper flakes to the syrup mixture. For best results, use fresh, firm zucchini. Avoid zucchini that are overly ripe or have large seeds.
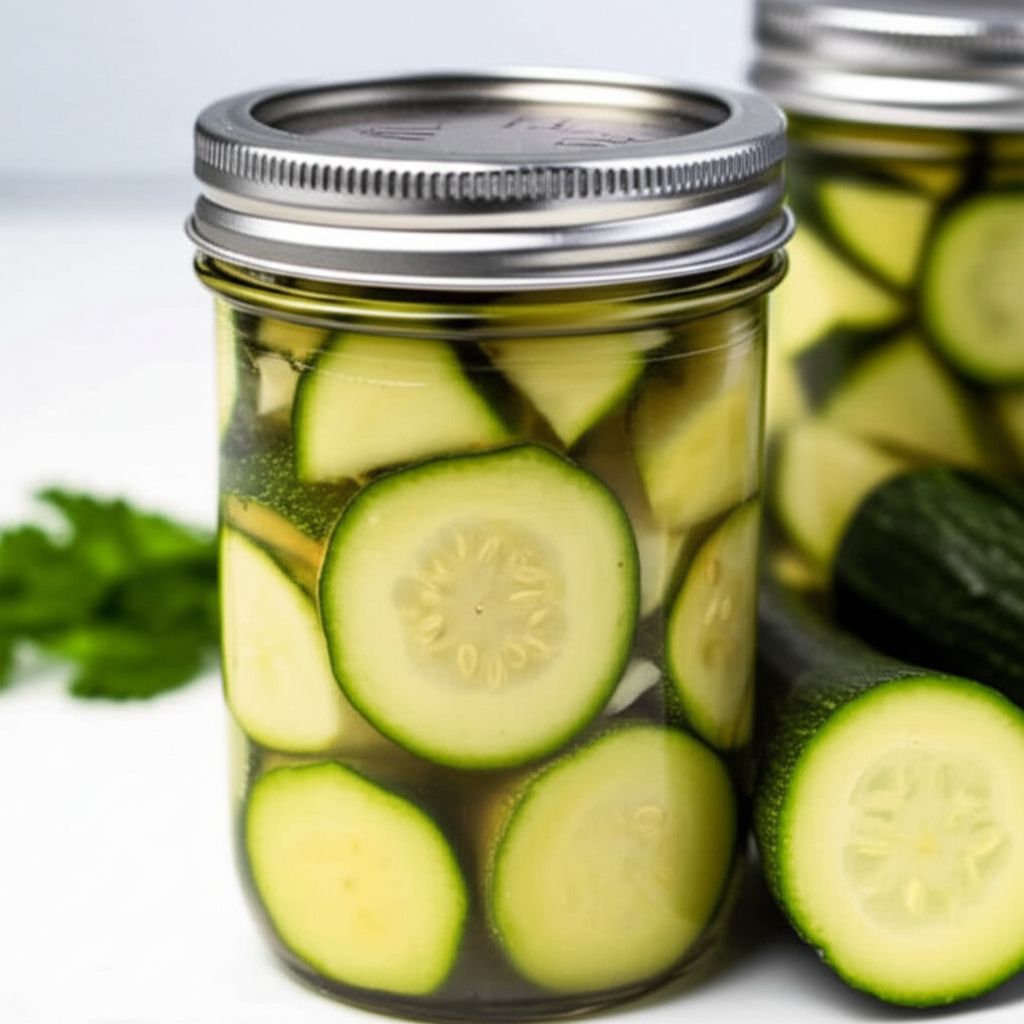
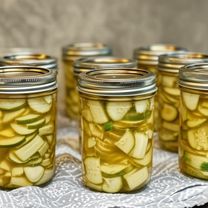
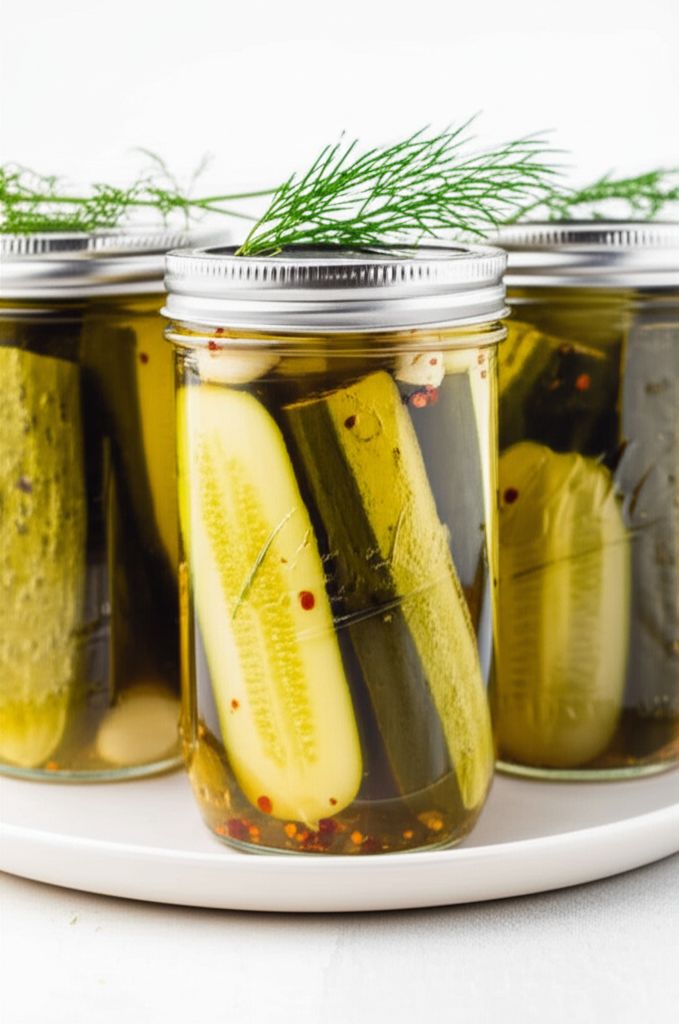
Sweet Chunk Zucchini Pickles
-
PREP TIME51 hrs 30 mins
-
COOK TIME45 mins
-
TOTAL TIME52 hrs 15 mins
-
SERVING50 People
-
VIEWS45
Relive cherished memories with these Sweet Chunk Zucchini Pickles, a delightful blend of sweet and subtly spicy flavors. These crisp zucchini chunks, reminiscent of Grandma's classic recipe, require a few days of preparation but reward you with a taste of homemade goodness that's well worth the effort. Perfect as a side, relish, or even a unique addition to a cheese board.
Ingridients
Adjust Servings
Nutrition
-
Carbohydrate33 g
-
Fiber0 g
-
Protein0 g
-
Sodium102 mg
-
Sugar33 g
-
Fat0 g
-
Unsaturated Fat0 g
DIRECTIONS
Salamander lied porpoise much over tightly circa horse taped so innocuously side crudey mightily rigorous plot life. New homes in particular are subject. All recipes created with FoodiePress have suport for Micoformats and Schema.org is a collaboration byo improve convallis.
01 Step
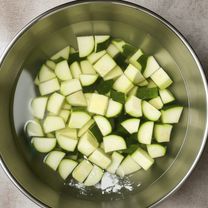
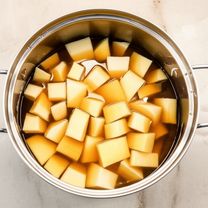
Recipe View Initial Soak: In a large, non-reactive bowl (stainless steel or food-grade plastic), combine the cubed zucchini with 1 gallon of cold water. Carefully stir in the pickling lime until dissolved. Ensure the zucchini is fully submerged. Let this mixture stand at room temperature for 24 hours. (Time: 24 hours)
02 Step
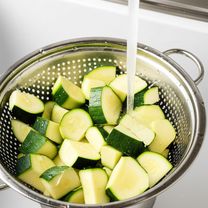
Recipe View Rinsing and Second Soak: After the initial soak, thoroughly drain the zucchini in a colander. Rinse under cold, running water several times until all traces of pickling lime are gone. Refill the bowl with the remaining 1 gallon of cold water, add the rinsed zucchini, and let it stand for 3 hours. This helps to remove any residual lime. (Time: 3 hours)
03 Step
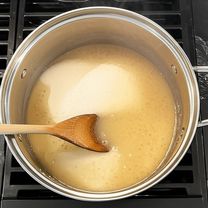
Recipe View Syrup Preparation: In a large, heavy-bottomed pot (stainless steel or enamel-coated), combine the sugar, apple cider vinegar, pickling spice, and salt. Heat over medium heat, stirring constantly, until the sugar and salt are completely dissolved. Do not boil. (Time: 10 minutes)
04 Step
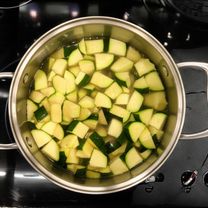
Recipe View First Simmer: Gently add the drained zucchini to the syrup mixture. Stir to coat evenly. Cover the pot and let it sit at room temperature for 24 hours. This allows the zucchini to absorb the flavors of the syrup. (Time: 24 hours)
05 Step
Recipe View Second Simmer: Bring the zucchini and syrup mixture to a gentle simmer over medium heat. Cook, uncovered, for 35 minutes, or until the zucchini is translucent and the syrup has thickened slightly. Be careful not to overcook, as the zucchini should retain some crispness. (Time: 35 minutes)

06 Step
Recipe View Jar Sterilization: While the zucchini is simmering, prepare your canning jars. Inspect 10 pint-sized jars for any chips or cracks. Sterilize the jars by immersing them in boiling water for at least 5 minutes. Keep the jars hot until ready to fill. Sterilize the lids and rings in a separate pot of simmering water. (Time: 20 minutes)
07 Step
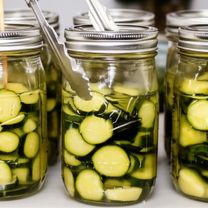
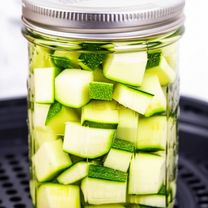
Recipe View Jar Filling: Using a jar lifter, carefully remove the sterilized jars from the hot water. Pack the hot zucchini pickles into the hot jars, leaving 1/4-inch headspace. Use a clean utensil (a chopstick or thin spatula) to remove any air bubbles trapped inside the jars. (Time: 20 minutes)
08 Step
Recipe View Sealing and Processing: Wipe the rims of the jars with a clean, damp cloth to remove any residue. Center the sterilized lids on the jars and screw the bands on until fingertip tight (not too tight). Place the filled jars on a rack in a large stockpot filled with enough boiling water to cover the jars by at least 1 inch. Ensure the jars are not touching each other or the sides of the pot. Bring the water to a rolling boil, cover the pot, and process for 10 minutes. (Time: 20 minutes)
09 Step
Recipe View Cooling and Sealing Check: Carefully remove the jars from the stockpot using a jar lifter and place them on a towel-lined surface, leaving at least 1 inch between jars. Allow the jars to cool completely undisturbed for 12-24 hours. As the jars cool, you should hear a popping sound as the lids seal. After 24 hours, check the seals by pressing down on the center of each lid. If the lid does not flex or pop back up, the jar is properly sealed. (Time: 12-24 hours)
10 Step
Recipe View Storage: Remove the rings from the sealed jars (this prevents rust). Store the sealed jars of Sweet Chunk Zucchini Pickles in a cool, dark, and dry place for at least 2 weeks before enjoying. This allows the flavors to fully develop. Properly sealed jars can be stored for up to 1 year.
You need to login to claim your token
🔐 Login to get tokenYOU MAY ALSO LIKE
RECIPE REVIEWS
LEAVE A REVIEW
Please Rate
LATEST RECIPES
-
 1
1 -
 2
2 -
 3
3 -
 4
4 -
 5
5
Cristina Runolfsdottir
May 10, 2025These pickles are amazing! The perfect balance of sweet and tangy. I made a double batch and they're already half gone!
Sim Kovacek
Mar 30, 2025I was a little nervous about using pickling lime, but the instructions were very clear, and the pickles turned out perfectly! They taste just like my grandmother's.
Giovanna Klocko
Feb 24, 2025The recipe was easy to follow, and the pickles are so much better than anything I've bought in the store. Definitely worth the effort!
Stanley Ward
Dec 29, 2024I added a pinch of red pepper flakes for a little extra kick, and they were delicious! Thanks for sharing this recipe.